Complex Carbine Malfunctions
In Part 3, I analyzed the first two complex carbine malfunctions: deep failure to eject and failure to extract. In this final part of the series, we’ll look at the other three complex malfunctions: double feed, triple feed and failure to unlock. Keep in mind that the remedial action process for these complex malfunctions takes time, but with proper training and continued practice, it can be done rapidly.
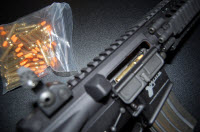
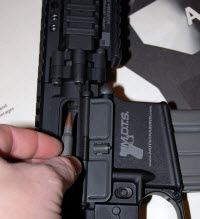
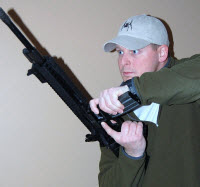
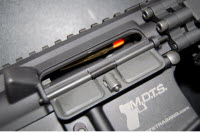
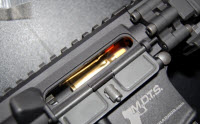
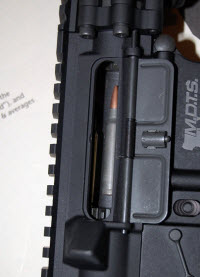
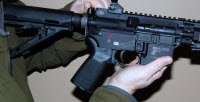
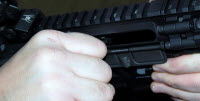
Double Feed: With a true double feed, two rounds have come out of the magazine and both are being forced into the chamber by the bolt in a “V” configuration. A double feed can be caused by having a dirty weapon, or a bad or overloaded magazine. The operator will feel a MUSH when attempting to fire and follow our Refunction Mantra: MUSH means RIP.
Setting Up the Double Feed:
At Home
- -Verify you are using only dummy rounds!
- -Carbine, (2) dummy rounds and magazine.
- -With the bolt locked back, insert a magazine with dummy round into the magazine well.
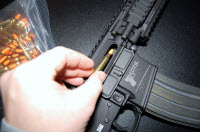
- -Manually drop another dummy round into the ejection port.
- -Release the bolt forward.

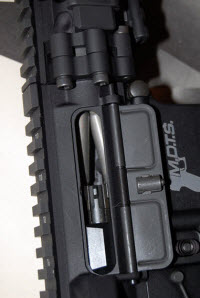
Note: “V” Configuration
On the Range
- -Carbine, (1) live round and a magazine with live rounds.
- -With the bolt locked back, insert the magazine with live rounds into the magazine well.
- -Manually drop another live round into the ejection port.
- -Release the bolt forward.
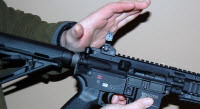
Double Feed – MUSH means RIP (RAD)
WARNING! If a TAP, RACK is initiated, this malfunction can be made more severe by hammering the rounds deeper into the chamber!
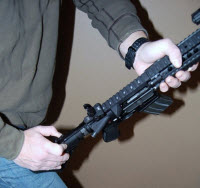
*Finger out of trigger guard.

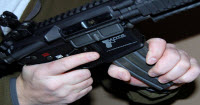
Triple Feed (Charging Handle Impingement):
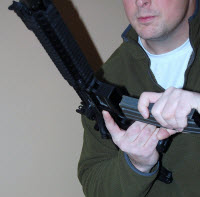
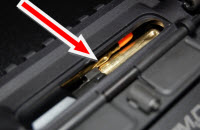
The triple feed occurs when a spent casing becomes lodged in the carrier key channel above the bolt carrier, a live round is in the chamber, and another round is attempting to be fed into the chamber. This malfunction is commonly caused when the operator clears a failure to eject improperly by rolling the carbine inboard (ejection port upward) instead of outboard during remediation and rides the charging handle forward, or by blocking the ejection port. These operator errors cause the casing either to fall back into the receiver or remain in the receiver, where it gets kicked up into the carrier key channel by the bolt reciprocating and attempting to feed a new round. The end results are a spent casing above the bolt carrier impinging the charging handle, and a double feed in the chamber. The operator will feel a MUSH and follow our Refunction Mantra: MUSH means RIP.
Setting Up the Triple Feed:
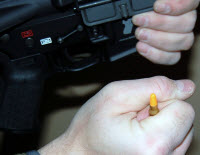
- -Verify you are using only dummy rounds!
- -Carbine, (3) dummy rounds and a magazine.
- -With the bolt locked back, manually insert a dummy round into the chamber and roll the carbine magazine well up so the dummy round falls into the carrier key channel.
- -Insert magazine with dummy round.
- -Manually insert another round into the receiver.
- Release the bolt forward.
- -Carbine, (1) live round, (1) spent casing and a magazine with live rounds.
- -With the bolt locked back, manually insert a spent casing into the chamber and roll the carbine magazine well up until the spent casing rolls into the carrier key channel.
- -Insert magazine loaded with live rounds.
- -Manually insert another live round into the receiver.
- -Release the bolt forward.

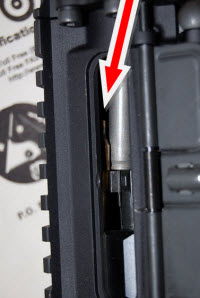
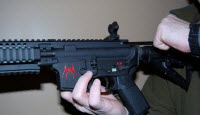
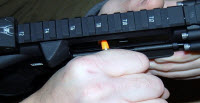
Note: brass above bolt

Triple Feed – MUSH means RIP (RAD)
*Finger out of trigger guard.

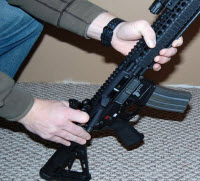
PULL and HOLD charging handle back as far as possible, INSERT a finger and DIGITALLY MANIPULATE any stuck casings/rounds out
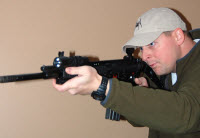
Transfer carbine to left shoulder for better visual.
This MUST be done in order to remediate the charging handle impingement.
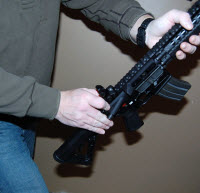
Shake carbine until casing lodged in carrier key channel above bolt falls free.
Failure To Unlock:
This is where the bolt will not unlock from the chamber. The failure to unlock can be caused by having a dirty weapon (operator error), a bulged casing, worn locking lugs, a lubricated chamber or non-spec ammunition. Remediation of this malfunction can be either administrative or combative, depending upon how tightly the bolt is locked. This malfunction cannot be replicated for training purposes, but in high-round-count courses, it is not uncommon to see one or two.
While this method may work, it can damage the stock of the firearm and/or bend the buffer tube, rendering the firearm inoperable. Utilizing this technique also limits mobility when assuming a kneeling position, which is not recommended in any combative environment.
Remediating malfunctions efficiently gets you back in action quickly. Although you can take certain actions up front to minimize the number of malfunctions you experience (e.g., using quality magazines and ammo, keeping your weapon clean, replacing worn parts), you may still experience one for any of the reasons outlined throughout this series, and experience it at an inopportune time. Being able to perform the remedial action drills for each malfunction will keep your carbine from turning into a club.

Share tips, start a discussion or ask one of our experts or other students a question.
Already a member? Sign in
No Responses to “Carbine Malfunctions, Diagnosis and Remediation, Part 4”