Transition Step 2
www.personaldefensenetwork.comEven these days, I run across members of the U.S. Military who might only be issued a rifle, or even more commonly, may choose not to carry a handgun on an operation for some particular reason. And how about the civilian gun owner who chooses to grab a rifle to defend his property? He certainly might need to know how to manipulate his rifle with one hand.
Question:
How often are one-handed manipulations with a rifle (or even a handgun, for that matter) required? And is it worth my precious training time and ammunition to practice them?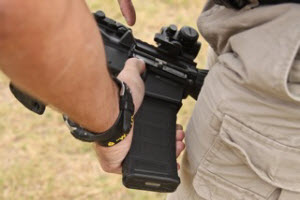
Safety Note: One-handed survival shooting is a high-level manipulation skill that must be practiced correctly and safely. If you do not have the knowledge to practice these techniques, please find a qualified instructor to teach you the skills that will allow you to practice them safely. Training one-handed survival techniques includes the possibility of pointing the muzzle in an unsafe direction, so ensure you get quality instruction if needed!
How To
Let’s get into the details of manipulating and shooting your rifle with one hand. First, if you have not read my article Survival Shooting Techniques, which addresses one-handed handgun manipulation, please do, since using a handgun with one hand is the first option I will guide you to if you are carrying one. This is simply because using (shooting and manipulating) a rifle with only one hand is very difficult because of its weight and length.
Secondly, please understand that this article addresses the M-4/16 rifle system and its variants, simply because that is what I think most readers will be carrying. If you use another rifle, the same principles should be followed, but you might have to experiment with your particular rifle to refine your techniques. Please do so safely with non-live dummy rounds before using live ammunition!
The following techniques all incorporate some of the same items, such as where to secure the rifle while manipulating, how to manipulate the bolt with one hand, how to release the magazine with one hand, etc.
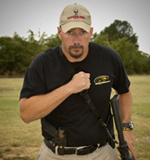
Scenario: the worst has occurred. You’re in a fight for your life and you’ve been injured. You have only one hand to shoot the rifle. The following techniques will allow you to fight through the situation and survive.
One-Handed Shooting Techniques
First let’s discuss actually shooting a rifle with only one hand. Due to the fact that using a rifle effectively requires the use of both hands, how do we shoot it with only one hand? Here are two options, both of which I recommend testing and training with on the range:
Tuck the buttstock.
www.personaldefensenetwork.comThis is often the best choice if you are smaller or lack significant upper body strength. Tucking the buttstock under your arm and maintaining control with your hand on the pistol grip are the best ways to control the rifle. This position is limiting in that it does not allow you to mount the sights or optic in front of your face.
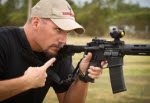
Mount on shoulder.
www.personaldefensenetwork.comThis option is my personal choice. It allows me to continue to use the sights on the rifle since the buttstock is mounted in my shoulder. It does take more strength than the other technique, but is effective if you can make it work.
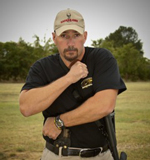
You’re in the middle of a fight with only one arm, and your rifle stops functioning. What now?
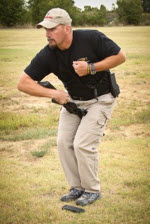
Transition Step 1
www.personaldefensenetwork.comDepending on the distance to the threat and the situation, transitioning to your handgun might be the best option, especially if you are fighting in your house or a building. Knowing how to draw and manipulate your handgun with the support hand is key here, so ensure you have those skills too. Phase I: Tap, Rack, Ready
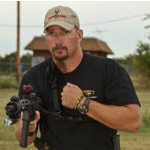
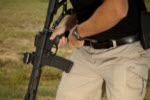
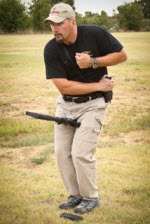
Transition Step 2
www.personaldefensenetwork.comIf transitioning is not a logical option, fixing or reloading the rifle is your best option. Let’s discuss the techniques for these options.
One-Handed Malfunction Clearance
There are two malfunction clearances that I will define as Phase I and II malfunctions. Each will fix almost any malfunction you might have occurring.
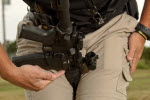
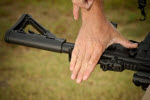
Tap the magazine.
www.personaldefensenetwork.com- Tap the magazine in the gun by bringing the gun down with some force onto the top of the leg. This should secure the magazine in the gun if that was the problem.
Secure the rifle.
www.personaldefensenetwork.com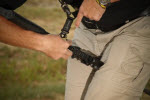
Work the bolt.
www.personaldefensenetwork.comPhase II: Lock, Rip, Work, Tap, Rack, Ready
This is assuming you have already tried a Phase I, or observed a malfunction that you know a Phase I clearance will not fix.
Lock the bolt 1.
www.personaldefensenetwork.com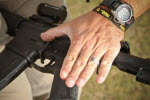
Lock the bolt 2.
www.personaldefensenetwork.com
Rip the magazine.
www.personaldefensenetwork.com- Work the bolt at least twice to extract any remaining brass/ammunition from the chamber. You can also use a finger sweep during this step if you find a piece of brass stuck in the chamber area.
- Follow the Tap, Rack, Ready steps to tap a new magazine in the gun. Don’t forget to tug! Rack the bolt with the charging handle, and you’re ready to shoot if the situation still warrants it.
One-Handed Reloads
Performing a reload with one hand will require the same securing method (between the knees) to maintain control of the rifle. Another option that works if mobility is a concern is simply letting the rifle hang from the sling while performing the following motions, but be aware that using this technique offers much less support of the rifle, and the muzzle direction might be unsafe when operating the bolt. Reloading key points:
- Releasing the magazine with the right hand in operation: Hit the magazine button with your index finger and let the magazine fall out of the gun before securing the gun between your legs.
Access the magazine.
www.personaldefensenetwork.com- Access the new magazine and reload: Grabbing the magazine might be more or less challenging depending on where you keep your extra magazines. (This might cause you to modify your gear a bit.) When inserting the magazine with one hand, ensure that you secure it firmly and tug to ensure that it is seated in the gun. Release the bolt by grabbing the charging handle and slingshot it to release and cycle the bolt. Remember to do this aggressively, and do not ride the charging handle forward. The bolt release is an obvious choice to release the bolt, but in some cases it is hard to access, which is why I recommend using the charging handle.
Task fixation.
www.personaldefensenetwork.comTask Fixation
Don’t forget that, during any type of one-handed survival shooting manipulation, it is very important that you continue to keep your head and eyes up and in view of the threat area. It is natural to get fixated on the gun and area where you are working to get it running. While it is okay to glance down to assess in certain cases, it is still important to keep your head and eyes in the game so you can react to what the threat is doing. Make yourself look up when training!
Check Your Gear
One of the first things we cover in our one-handed manipulation and shooting blocks of instruction at USSA is gun and gear set-up. The type of holster, magazine pouch, sling, and other gear that you wear will affect how you operate your gun with one hand. Test your equipment trying different one-handed techniques, so you know their limitations, and find ways to work around any problems you might have. This takes time and dedicated training, and absolutely must be done to ensure you don’t end up having to figure it out during an actual fight.
Select the Right Technique
Techniques are usually best chosen by finding ones that are consistent and simple, but you will have to know several in order to operate with only one hand. The reason for this is that certain techniques simply will not work in all situations. I always teach multiple techniques and discuss with students when each might be used during our one-handed survival shooting class. Try not to limit yourself to firearm techniques only, and think outside the box when it comes to surviving with one hand. I often stress that a gun solution is not always the answer. It’s best for you to utilize a physical technique to shift the fight in your favor before trying to reload your gun or clear a malfunction with one hand.
Train for One-Handed Manipulations
I absolutely must stress the importance of getting training from a qualified instructor if you are unfamiliar with these techniques. Do not go to the range and attempt any one-handed technique until you have trained that technique with an unloaded firearm with dummy training ammunition. In classes, I stress hours of dry practice first, then a simple live-fire drill that allows the user to test all the techniques during live fire.
Conclusions
Manipulating and shooting with one hand are difficult skills to perform under stress. If you’re in a situation where a one-handed survival technique is needed, things have gone from bad (just having one hand in the fight) to worse (now having to fix a non-working gun with one hand). Figure out how to survive the situation in the comfort of your home with dry fire, or on your range during live-fire training before you end up in a fight for your life needing these particular skills. Don’t be caught unprepared!
Share tips, start a discussion or ask other students a question. If you have a question for an expert, please click here.
Already a member?

I am looking to buy a AR556 from Ruger, and have worked with a couple AR 's while making my final pick. I have my right hand missing my, left hand at the wrist for 35 yrs. It is a interesting article, from yrs ago, i think i can operate a ar 80% (plus) of the normal Joe with a little practice. Your other senses take over and you think more. This gun will only be used at the range for fun to keep my Fathers gun time in mind. Bob
Outstanding article. Thanks for the tips on this set of often overlooked manipulations.